 |
ChromeHistoryView v1.53
ChromeHistoryView v1.53
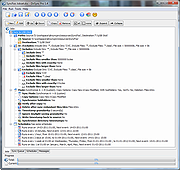
A small utility that reads the history data file of Google Chrome Web browser, and displays the list of all visited Web pages in the last days.
For each visited Web page, the following information is displayed: URL, Title, Visit Date/Time, Number of visits, number of times that the user typed this address (Typed Count), Referrer, and Visit ID.
You can select one or more history items, and them export them into html/xml/csv/text file, or copy the information to the clipboard and paste it into Excel.
You can also use this tool to read the history of other Chromium-based Web browsers, like Microsoft Edge, Opera, Vivaldi, and others...
Changes:
Version 1.53
Updated to read the history file of the latest Opera versions.
Using ChromeHistoryView
ChromeHistoryView doesn't require any installation process or additional DLL files. In order ti start using it, simply copy the executable file (ChromeHistoryView.exe) to any folder you like, and run it.
After you run it, the main window displays the list of visited Web pages loaded from the history file of Chrome Web browser. If you want to load the history file of another profile, simply use the Advanced Options window (F9) to choose another history file.
You can select one or more history items, and then export the list into html/xml/csv/text file ('Save Selected Items' option - Ctrl+S). You can also copy the selected items to the clipboard, and then paste them to Excel or to OpenOffice spreadsheet.
Command-Line Options
/stext <Filename> Save the Chrome browsing history into a regular text file.
/stab <Filename> Save the Chrome browsing history into a tab-delimited text file.
/scomma <Filename> Save the Chrome browsing history into a comma-delimited text file (csv).
/stabular <Filename> Save the Chrome browsing history into a tabular text file.
/shtml <Filename> Save the Chrome browsing history into HTML file (Horizontal).
/sverhtml <Filename> Save ... |
 |
5,615 |
Mar 18, 2024
Nir Sofer  |
 |
DirSync Pro v1.53 for Mac
DirSync Pro v1.53 for Mac
DirSync Pro is a small, but powerful utility for file and folder synchronization. DirSync Pro can be used to synchronize the content of one or many folders recursively. Use DirSync Pro to easily synchronize files from your desktop PC to your USB-stick (/Externa HD/PDA/Notebook, ...). Use this USB-stick (/Externa HD/PDA/Notebook, ...) to synchronize files to another desktop PC.
Using DirSync Pro you can make incremental backups. In this way you'll spare lots of time because you don't have to copy all the files each time you want to update your backup; only new/modified/larger files would be copied. DirSync Pro provides some preconfigured modes (e.g. Mirror, Backup, Contribute, …) for common synchronization and backup tasks and some custom modes in which the user could set up the synchronization behavior to meet specific wishes. Prior to synchronization, DirSync Pro perfoms an analysis on files and folders and detect any kind of changes to any file/directory in the source. If a file is for example modified, removed, deleted, renamed in the source DirSync Pro synchronizes the destination accordingly. DirSync Pro detects also changes to file meta data (e.g. DOS attributes, POSIX file ownerships/group/permissions) and could preserve them to the destination file/directories.
DirSync Pro has a user-friendly User Interface which helps you configure many options to your needs. You can use DirSync Pro also through the command line which makes it very flexible for running in batches.
DirSync Pro lets you define advanced filters based of filename patterns (textual and regular expression based), file sizes, modification dates, file paths and file meta data to include or exclude file/directories as desired.
DirSync Pro has a powerful schedule engine which lets you schedule synchronization tasks on many different ways, minutely, hourly, daily, weekly and monthly. Advanced users may use tons of options available in DirSync ... |
 |
5,110 |
Dec 21, 2021
ogivi  |
 |
DirSync Pro v1.53 for Windows
DirSync Pro v1.53 for Windows
DirSync Pro is a small, but powerful utility for file and folder synchronization. DirSync Pro can be used to synchronize the content of one or many folders recursively. Use DirSync Pro to easily synchronize files from your desktop PC to your USB-stick (/Externa HD/PDA/Notebook, ...). Use this USB-stick (/Externa HD/PDA/Notebook, ...) to synchronize files to another desktop PC.
Using DirSync Pro you can make incremental backups. In this way you'll spare lots of time because you don't have to copy all the files each time you want to update your backup; only new/modified/larger files would be copied. DirSync Pro provides some preconfigured modes (e.g. Mirror, Backup, Contribute, …) for common synchronization and backup tasks and some custom modes in which the user could set up the synchronization behavior to meet specific wishes. Prior to synchronization, DirSync Pro perfoms an analysis on files and folders and detect any kind of changes to any file/directory in the source. If a file is for example modified, removed, deleted, renamed in the source DirSync Pro synchronizes the destination accordingly. DirSync Pro detects also changes to file meta data (e.g. DOS attributes, POSIX file ownerships/group/permissions) and could preserve them to the destination file/directories.
DirSync Pro has a user-friendly User Interface which helps you configure many options to your needs. You can use DirSync Pro also through the command line which makes it very flexible for running in batches.
DirSync Pro lets you define advanced filters based of filename patterns (textual and regular expression based), file sizes, modification dates, file paths and file meta data to include or exclude file/directories as desired.
DirSync Pro has a powerful schedule engine which lets you schedule synchronization tasks on many different ways, minutely, hourly, daily, weekly and monthly. Advanced users may use tons of options available in DirSync ... |
 |
5,381 |
Dec 21, 2021
ogivi  |
 |
Mr.Shot v1.53
Mr.Shot v1.53
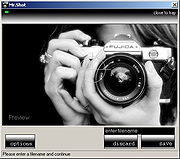
Mr.Shot captures screeshots of your desktop, any active window or clip of the screen.
Features:
Capture Desktop : Control + D
Capture Window : Control + W
Capture Clip : Control + Z (Click 'N Drag)
Customize your own shortcut keys
Select folder to save your shots.
Open containing folder right after your shot.
Auto start on Windows.
Start minimized in tray.
|
 |
8,838 |
Jul 02, 2020
Mr.Shot  |
 |
SimpleWMIView v1.53
SimpleWMIView v1.53
Simple WMI Viewer for Windows
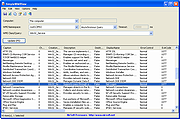
A simple tool for Windows that displays the result of WMI queries in a simple table, and allows you to easily export the data to text/csv/tab-delimited/html/xml file, or to copy the selected items to the clipboard and then paste them to Excel or other spreadsheet application.
With SimpleWMIView you can get extensive information about your system, like a list of running processes, services, drivers, user accounts, hardware, and so on...
System Requirements
This utility works on any version of Windows, starting from Windows XP and up to Windows 11. Both 32-bit and 64-bit systems are supported.
Changes:
Version 1.53:
Added 'Sort By' button to the toolbar.
Start Using SimpleWMIView
SimpleWMIView doesn't require any installation process or additional DLL files. In order to starting using it, simply run the executable file - SimpleWMIView.exe
After running it, you can type or choose the desired namespace (The default is the most common one - root\CIMV2) and then the class name (The default is Win32_Process, which lists all running processes on your system). You can also type a full WQL query, like 'SELECT * FROM Win32_Process WHERE Priority > 8'. After choosing the namespace and class, simply press F5 (or the Update button) to execute the WMI query and then watch the result inside the table.
Examples for what you can get with WMI
Here's some examples of the information you can get with WMI queries (On root\CIMV2 namespace):
Win32_Service - Lists all Windows services.
Win32_Share - Lists all network shares on your machine.
Win32_StartupCommand - Lists programs that run on Windows startup.
Win32_SystemAccount - Lists all system accounts.
Win32_UserAccount - Lists all user accounts.
Win32_SystemDriver - Lists all drivers installed ... |
 |
5,529 |
Mar 01, 2023
Nir Sofer  |


